LiveInternetLiveInternet
Quote from Olga-V's message
Read in full In your quotation book or community!
Coffee drawing on paper “Butterfly”.
Author: Yulia Grechukhina
Once again I welcome lovers of coffee and creativity, coffee creativity! I am glad to share with you a new master class. Today we will draw a butterfly. Yes, I have never hidden the fact that I am a bad photographer, but step-by-step photos will be more convenient in any case.
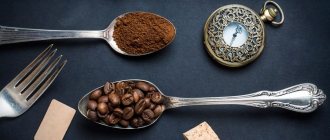
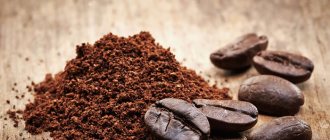
So, let me repeat myself a bit. For coffee drawings, don’t be greedy, friends, take good watercolor paper, with a density of 300 g/m2. We also don’t skimp on coffee, even though it’s instant in granules, but it’s not the cheapest, but one that drinks deliciously! It is important. We dilute it thickly in water until we get a dark, dark coffee syrup (coffee plus water). Synthetic brushes, different sizes. Wide ones are for the background, small ones are for drawing. You will also need water to wet the paper and wash the brushes, granulated sugar and regular white paper napkins. Oh yes, there is also a piece of padding polyester in the photo. It’s not a vital thing, but it’s convenient for creating a background – wider than the widest brush!
We moisten a sheet of paper with a piece of padding polyester dipped in water or a large brush. We soaked it and let it soak in. The leaf turns out not wet, not in puddles, but damp, soaked in water. We quickly sketch out the background using a raw sheet of paper. In my example, background alignment is not required. It’s lighter in some places, darker in others, that’s how it’s intended.
Now it's sugar's turn. Take a pinch of sugar grains and sprinkle on the wet background. It seems like nothing is happening, but you just need to wait and you will see stars and specks.
You need the right degree of leaf moisture; with experience, everyone will be able to feel it. If the background is too dry, there will be no more stars. The sugar beans will just stick and collect some color around them. Average degree of moisture - stars and snowflakes. Excessive phlegm - the sugar will melt, and “coffee syrups” will form - places that dry out poorly and stick. In my example, the first two options were combined - the result was both grains and stars. I was satisfied, no stickiness! 
After preparing the background, it's time to draw the butterfly. I don't use sketches, but a light pencil drawing has a right to exist. I somehow thought that I could take a brown pencil, then the pencil would not stand out in the general tones of the coffee drawing! I think this is a great idea. However, see for yourself whether a sketch is needed. I take a damp brush and wash out the butterfly silhouette a little with water. Then I tear off pieces of napkin and glue them along the bottom of the picture simply onto a damp background, i.e. without any glue. And then I moisten these spots with a saturated coffee solution. They turn out very dark (but not sticky) and a little voluminous.
Now we draw the picture with a small brush, little by little, slowly, adding flowers and other little details of the picture. The longest stage is drawing. Sometimes I work on detailing for several evenings, depending on the size and complexity of the drawing.
There are blades of grass too, let’s draw them too. If it is difficult to draw from memory, then we actively use photographic material. I myself love to draw from photos. Not even copying completely, but simply focusing on some beautiful image. There is so much beauty on the Internet that it is simply impossible not to quote the photos you like. I am happy to translate them into the language of coffee grisaille. And I invite you to join this exciting drawing technique!
Finally, add the silhouettes of butterflies in the background. I simply “washed” them with water from the background. At this stage, the artist in me was exhausted. I signed it. I gathered all my photographic efforts and took the final photo of the work. The painting was placed in a frame under glass. And she fulfilled the promise of master class No. 2. At this point I take my leave and wish everyone creative success and a coffee mood!
All the best!
I look forward to your comments.
Sincerely, Yulia Grechukhina
master's store: https://www.livemaster.ru/delopodushe
Series of messages “= crafts...miscellaneous”:
Part 1 - For fans of the Shabby chic style, cheap and not very cheerful Part 2 - Creativity in the interior. ... Part 23 - Quick Christmas trees. M.K.)) Master's shop Dress-studio (dress-studio) Part 24 - New Year's Packaging in 15 minutes! Part 25 - Coffee drawing on paper “Butterfly”. Part 26 - Imitation of wax seal made of clay. Part 27 - DIY New Year's candlestick. Decorate the glass with structural paste.
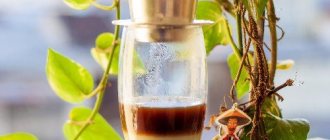
Faberge chocolate egg. What they don’t draw in our world. Unconventional drawing techniques are interesting. Coffee-art is one of the non-traditional drawing techniques. I don’t think that it is widely known even to people who are interested in painting.
But the popularity of coffee-art is growing.
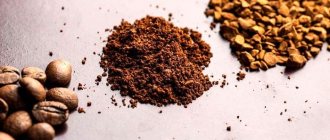
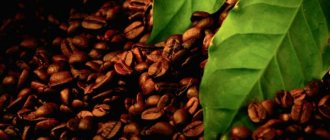
Artists create paintings using this painting technique using a solution of natural coffee or granulated instant coffee, but not cheap coffee. This is a coffee watercolor. Coffee artists working in a “coffee” vein sometimes combine these materials: coffee and real watercolor. Spices are added, creating the most aromatic pictures. The tone of the coffee solution depends on the amount of water in it.
The coffee art direction emerged in the 90s of the last millennium. The first paintings painted exclusively using coffee were by artists from Thailand and India.
Coffee is a very common drink. It is not surprising that sooner or later this unconventional painting technique had to arise. You can see how it looks in the paintings of the masters.
Coffee equipment: paintings by masters
Masters of coffee painting can master any subject. Coffee paintings are preserved under glass for a long time.
Images of people
Animal images
Residents of the African savannah
Forest Dwellers
Landscapes
Coffee landscape
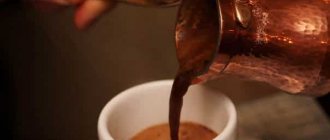
Chocolate painting technique
To be honest, I also didn’t know about such an unconventional drawing technique until I attended Yulia Latte’s master class. But this technique was already known during the time of Faberge (picture above), and perhaps even earlier.
Unconventional technique of painting with chocolate
Warm chocolate is used as paint to create chocolate paintings. The variety of colors in this unconventional painting technique will be wider than in coffee painting.
Chocolate itself comes in several colors, which can be mixed in various proportions.
Chocolate painting as a gift
Food and natural dyes are applicable: spices, finely ground dry colored berries and vegetables (which is even better).
Nuts of various sizes, colors and tastes can be used as supplements. And, of course, dried fruits.
For chocolate paintings you will need a chocolate background. That is, the picture is completely edible.
The non-traditional technique of painting with chocolate is not so simple. Without knowing the subtleties, it is easy to spoil the material. But imagine how great it is to receive an exceptionally original gift.
It's great when a child has the opportunity to experiment by drawing with different materials. This is what our art schools lack.
0